How to Migrate Your Website to a New Kenyan Host Without Losing Data
Migrating your website is often viewed as a daunting, high-risk technical task. The fear of losing data, experiencing extended downtime, or breaking email functionality is enough to keep many businesses stuck on slow, suboptimal hosting plans. But if you’re targeting customers in Kenya, staying with an international host is a missed opportunity for performance and local engagement.
The goal of this comprehensive guide is to provide a zero-downtime blueprint. We will provide a seven-step roadmap to successfully migrate your website to a new Kenyan host—such as Host Kenya, Truehost,HostPinnacle, or Host Africa—while maintaining absolute data integrity and protecting your SEO rankings.
If your current site is suffering from slow load times or unreliable performance, this process is your path to a significant performance upgrade.
I. Why Migrate Your Website to a Local Kenyan Host Matters
The decision to migrate your website is not just about changing servers; it’s a strategic move to optimize your business for the Kenyan digital landscape. This strategic process to migrate your website can unlock speed, save you money, and improve your local presence.
A. The Performance Advantage of Local Latency
Latency is the single most critical reason to migrate your website locally. Latency is the delay before a transfer of data begins following an instruction. In simple terms, it’s the time it takes for a request from a user in Nairobi to reach your server.
When you host internationally (e.g., in the USA or Europe), your data must travel thousands of kilometers. Even at the speed of light, this distance adds valuable time to your site’s loading process.
Distance is Time: This geographical separation translates directly to a slower Time To First Byte (TTFB), which is the time it takes for the browser to receive the first byte of data from the server.
Speed and SEO: Google heavily favors fast websites. Faster loading helps your site satisfy Core Web Vitals metrics, directly improving your ranking potential and reducing your bounce rate (the percentage of visitors who leave the site quickly).
“For every second your website takes to load, your conversion rate can drop by 7%.” – Akamai Research
B. Business and Financial Benefits of a Website Transfer
A local website transfer offers practical, non-technical benefits crucial for Kenyan Small and Medium Enterprises (SMEs):
M-Pesa Integration & Local Billing: Nearly all local hosts (e.g., HostPinnacle, Sasahost) offer seamless payment via M-Pesa. This simplifies yearly renewals, eliminates expensive currency conversion charges, and ensures prompt payment without relying on international credit cards or PayPal. This alone can save a business significant money over a year.
Relevant Support: When technical issues arise, local support teams understand the intricacies of the Kenyan internet backbone, local fiber optic issues, and regional network outages. Their troubleshooting is inherently more targeted and faster than waiting for international support during non-local business hours.
Local SEO Signal: While not the biggest ranking factor, hosting your site on a Kenyan IP address, paired with a $\text{.co.ke}$ domain, strengthens your relevance signal to Google for localized search intent.
C. A Quick Comparison of Kenyan Hosting Options
When you choose to migrate your website, you have strong local choices. Here is a brief look at some of the most popular providers known for reliability and local focus:
Known for fast NVMe-SSD servers; ideal for performance-hungry sites.
E-commerce and high-traffic blogs that need speed.
Host Africa (formerly Sasahost)
Robust enterprise infrastructure; provides advanced security features like Imunify360.
Established businesses that prioritize security and reliability.
Safaricom Web Hosting
Has truly local data centers in Kenya, offering the absolute lowest latency possible.
Sites where the vast majority of traffic is purely local.
In-Depth Fact: Safaricom’s advantage stems from its direct connection to the country’s primary telecommunications infrastructure. Choosing a host that is accredited by the Communication Authority of Kenya (CAK) or is a member of the Kenya Network Information Centre (KENIC) ensures they operate under local standards and best practices.
II. The Essential Pre-Migration Checklist
A successful website migration is $\mathbf{90\%}$ preparation and $\mathbf{10\%}$ execution. Skipping this phase is the single most common reason for failure, resulting in data loss, prolonged downtime, and lost business revenue. A thorough inventory protects you against these risks as you migrate your website.
A. Comprehensive Website Audit and Inventory
Before you touch any files, take a complete inventory and health check of your old site. Think of this as creating a detailed architectural blueprint of your existing home before you build a new foundation.
Hosting Environment Details:
Note your current hosting type (Shared, VPS, Dedicated) and the specific control panel (cPanel, Plesk, CyberPanel).
Determine your CMS and PHP Version (e.g., WordPress 6.4.3, running on PHP 8.1). The new server MUST support this exact configuration to avoid immediate compatibility errors after you migrate your website.
Data Size and Structure:
Use your current control panel’s file manager to note the total size of your $\mathbf{\text{public\_html}}$ folder (website files) and your $\mathbf{MySQL}$ database size. This ensures your new Kenyan host’s plan has adequate storage and resources.
Clean House:
Run a thorough security scan (using tools like WordFence or Sucuri) to ensure you dont migrate your website with existing malware, spam files, or hidden backdoors. Migrate only clean, essential data.
Delete unnecessary assets such as old themes, unused plugins, and large, redundant media files to lighten the transfer load and improve speed on the new host.
B. Critical DNS and Email Records Inventory
Losing email access is the most frequent and painful post-migration support issue. Protect your communication by documenting everything related to your domain and email routing.
DNS Records Snapshot: Log into your domain registrar (where you purchased the $\text{.co.ke}$ domain) or your current DNS manager (like Cloudflare) and take screenshots or manually list every record:
$\mathbf{A\ Records:}$ The IP address your main domain points to.
$\mathbf{CNAME\ Records:}$ Used for subdomains (e.g., $\text{blog.yourdomain.co.ke}$).
$\mathbf{MX\ Records:}$ Absolutely crucial for email routing. Write down the priority and destination server for each one.
$\mathbf{TXT\ Records:}$ Often used for email verification ($\mathbf{SPF}$ and $\mathbf{DKIM}$) and domain ownership confirmation.
Email Accounts: List every active email address ($\text{[email protected]}$) and, if they are stored on the server, you must have a plan to back up the mailboxes themselves or recreate them on the new server.
SSL Certificate Files: If you are not using a free Let’s Encrypt certificate, you must locate the $\mathbf{Private\ Key}$ ($\text{.key}$) and $\mathbf{Certificate\ File}$ ($\text{.crt}$) to ensure you can re-install your security on the new server.
C. The TTL Time Bomb: Minimizing Propagation Delay
The $\mathbf{TTL}$ ($\mathbf{Time\ To\ Live}$) setting on your DNS records is your secret weapon for achieving near-zero downtime.
What it is: The TTL value tells every server on the internet how long to “remember” your old IP address before checking for an update. Standard TTL is $24$ hours ($86,400$ seconds). If you change your server, some users will see the old one for up to a full day!
Action Item: Lower the TTL:24 to 48 hours before you migrate your website, log into your DNS management area and $\mathbf{reduce\ the\ TTL}$ for your primary $\mathbf{A\ Record}$ to the lowest possible value (e.g., $\mathbf{300\ seconds}$, or $\mathbf{5\ minutes}$).
The Benefit: This forces DNS servers to check for updates every five minutes instead of every 24 hours, $\mathbf{drastically\ reducing\ the\ DNS\ propagation\ time}$ and minimizing downtime when you finally flip the switch to your new Kenyan host.
IV. Step 2: Creating a Full, Redundant Backup
This step is your insurance policy. Never proceed to migrate your website until you have at least two verified copies of your site data. The backup is your absolute guarantee of zero data loss. If anything goes wrong when you migrate your website, you can simply revert to this safe, recent copy.
A. The Two-Part Backup Strategy
Your complete website data lives in two distinct locations on the server, and both must be secured individually:
Website Files ($\mathbf{\text{public\_html}}$): This includes all static assets, application code, and media.
What it contains: Your PHP files, HTML, CSS, JavaScript, themes, plugins, and every image or video you’ve uploaded.
How to Back Up: The most thorough way is using an FTP/SFTP client (like FileZilla) to download the entire contents of your $\mathbf{\text{public\_html}}$ folder. Alternatively, use the “Full Backup” utility within cPanel to generate a single, comprehensive $\mathbf{\text{.zip}}$ file.
MySQL Database ($\mathbf{\text{.sql}}$): This is the dynamic heart of your site.
What it contains: All posts, pages, user accounts, comments, e-commerce orders, product inventory, and site settings. Without this, your site looks empty.
How to Back Up: Access phpMyAdmin via cPanel. Select your primary database, navigate to the “Export” tab, and choose the $\mathbf{SQL}$ format. This generates a single $\mathbf{.sql}$ file you must save.
B. Plugin-Based Backup for WordPress Users
For maximum simplicity, especially if you run WordPress, you can use specialized plugins that bundle all the necessary files and the database to migrate your website.
UpdraftPlus or All-in-One WP Migration: These popular tools package your entire site—files, database, themes, and plugins—into a single, massive, portable archive file.
The Benefit: This single file can be easily uploaded and restored on the new server using the same plugin. This makes the $\mathbf{website\ transfer}$ process significantly simpler, even for large sites.
Action Item: After the plugin finishes creating the archive, download this file immediately to your personal computer.
C. The Redundancy Rule: Storing Your Backup Safely
A backup is useless if it’s stored on the same server that crashes or is compromised. This is why you need redundancy.
The Expert Rule (3-2-1): Security experts recommend the 3-2-1 rule: keep $\mathbf{3}$ copies of your data, on $\mathbf{2}$ different media types, with $\mathbf{1}$ copy stored off-site.
Copy
Location
Medium Type
Purpose During Migration
Copy 1
Old Hosting Server
Hard Drive/SSD
The source data to migrate your website
Copy 2
Local Computer/SSD
Local Drive
Your primary, fastest rollback option.
Copy 3
Cloud Storage
Cloud/Remote
Safest copy, stored off-site (e.g., Google Drive, Dropbox).
Crucial Step: Download the single complete backup file (or the file set) to at least two secure, non-server locations (Copy 2 and Copy 3). $\mathbf{Do\ not}$ leave the only copy on the old server, as you are about to cancel that service. This redundancy is the core of a zero-data-loss when you migrate your website.
V. Step 3: Executing the Data Transfer
With your backups secured, you are now ready to begin the technical process to migrate your website. This step involves setting up the new environment on your Kenyan host and transferring the files and database. This is a delicate process that requires precision to ensure the site functions correctly when you flip the switch.
A. Provisioning the New Server Environment
Your goal here is to perfectly replicate the old site’s configuration on the new host’s server.
Domain Setup: Log into your new host’s control panel (cPanel is standard). Ensure your domain name ($\text{yourdomain.co.ke}$) is added as an Addon Domain or the Primary Domain for the account. At this stage, the domain’s Name Servers are still pointing to the old host, so the public won’t see any change yet.
Create Database: You must create a fresh, empty database on the new server.
Use the MySQL Database Wizard in cPanel.
Create a new database with a unique name (e.g., $\text{new\_data\_db}$).
Create a new database user (e.g., $\text{new\_db\_user}$) with a new, strong password.
Grant ALL PRIVILEGES to this new user for the new database. Record these credentials immediately; you will need them in the next step.
B. Uploading and Importing the Data
Now, we bring the files and the database into the new server space.
Transfer Files ($\mathbf{\text{public\_html}}$): Upload the backed-up $\mathbf{\text{public\_html}}$ $\mathbf{\text{.zip}}$ file (from Step 2) to the root of your new server using the File Manager in cPanel.
Efficiency Tip: Instead of using slow FTP to transfer thousands of files one by one, upload the $\mathbf{\text{.zip}}$ archive and then use the File Manager’s Extract function. This extraction happens server-side and is often 10x faster.
Import Database ($\mathbf{\text{.sql}}$): The database must be imported into the new, empty database you just created.
Access phpMyAdmin on the new server (it is usually linked from the cPanel).
Select the newly created, empty database ($\text{new\_data\_db}$).
Click the “Import” tab and upload your backed-up $\mathbf{\text{.sql}}$ file. This populates your database tables with all your content.
C. Updating Configuration Files
This is a critical, often-missed step when you migrate your website. For your application to work, it needs to be told where its content now resides.
The Connection Bridge: For dynamic sites like WordPress, the core application code must connect to the database to pull content. It uses a configuration file for this.
Action for WordPress Users: Open the $\mathbf{\text{wp-config.php}}$ file in your new $\text{public\_html}$ folder (via the File Manager or FTP). You must edit the following lines to reflect the new database name, user, and password you created in Step 3A:PHP/** The name of the database for WordPress */ define( 'DB_NAME', 'new_data_db' ); /** MySQL database username */ define( 'DB_USER', 'new_db_user' ); /** MySQL database password */ define( 'DB_PASSWORD', 'YourStrongPasswordHere' );
Critical Path Fixes (Database Serialisation): If you are moving from $\text{http}$ to $\text{https}$, or changing the domain name (e.g., $\text{.com}$ to $\text{.co.ke}$), simply changing the address in the settings isn’t enough. Many plugins and content builders store URLs as serialised data in the database. You must use a database search and replace tool (like a dedicated WordPress plugin or running a specific MySQL query) to safely update all instances of the old URL to the new URL, preventing broken links and functionality errors.
VI. Step 4: Testing the New Site Privately (Zero-Downtime Migration)
You must verify the new site is $\mathbf{100\%}$ functional before the public sees it. This crucial step is how you achieve zero-downtime website migration and ensure you Migrate Your website successfully before directing live traffic to your new Kenyan host.
A. How to Test Your New Website Without Changing DNS
Since your domain’s DNS is still pointing to the old server, everyone else in the world sees the live, old site. Only you can access the new site using one of these methods:
Host File Modification (The Expert’s Choice): This is the most reliable method for a true preview.
You temporarily edit the $\mathbf{\text{hosts}}$ file on your personal computer. This file tells your operating system where to find a website, overriding the global DNS.
The Action: You add a line that maps the new server’s IP address to your domain name.[New Server IP Address] yourdomain.co.ke
The Benefit: When you type $\text{yourdomain.co.ke}$ into your browser, it loads the new server. When your customer types it, their computer loads the old server. This gives you a safe, private window to test the entire website migration setup.
Temporary URL/IP Access: Most hosts provide a temporary IP-based URL (e.g., $\text{[http://192.168.1.1/](http://192.168.1.1/)\textasciitilde username}}$). While easier, this method can sometimes break relative links and is less accurate for testing than the $\text{hosts}$ file method.
B. The Zero-Downtime Functional Audit
While testing, you must act like a real user and check every single critical function. If you skip this, you risk losing revenue or customer data the moment you go live.
Function to Test
Purpose
Critical Check
Forms
Contact, subscription, lead generation forms.
Submit all forms to ensure mail is sent and received correctly on the new server.
E-commerce
Cart, checkout, payment gateways.
Run a full test purchase (use a low-value test product) to confirm M-Pesa or card payments are processed and the order is recorded in the new database.
Internal Links
Navigation and SEO-friendly slugs.
Click through several internal pages, categories, and posts to confirm all links and images load correctly, and there are no $\mathbf{404\ errors}$.
User Login
Customer portals, admin dashboards.
Log in as a customer and as an administrator. Ensure session handling and security protocols are active.
Speed
Performance post-transfer.
Use a local speed testing tool to ensure the new site (especially on its local Kenyan host) is genuinely faster.
In-Depth Knowledge: A key part of the zero-downtime strategy for active sites (like e-commerce) is understanding the data replication gap. Any new order placed on the old site after your initial backup will be lost if you don’t sync the database one last time right before the switch. Testing allows you to determine how large this final gap will be.
C. Securing the New Environment Before Launch
Before proceeding to the live switch, ensure basic security is active on the new Kenyan host:
SSL Configuration: Verify that the SSL certificate (either a custom paid one or a free Let’s Encrypt certificate provided by the host) is already installed and working correctly on the new server’s IP address. If it’s not active, your site will show a “Not Secure” warning upon launch.
File Permissions: Check that your files and folders have the correct permissions (typically $644$ for files and $755$ for folders) to prevent unauthorized execution or writing. This is a common oversight when you migrate your website manually.
VII. Step 5: The Go-Live Switch and DNS Propagation
Once you are $\mathbf{100\%}$ satisfied with the private testing on your new Kenyan host, the moment of truth arrives. This step is about coordinating the final data sync and updating the DNS to complete the process to migrate your website.
A. The Final Sync and Maintenance Mode
For any active website, especially e-commerce stores or high-traffic blogs, data changes constantly. You need one last, quick transfer.
Maintenance Mode: Place the old website in “Maintenance Mode.” Use a WordPress plugin (like SeedProd) or a simple $\mathbf{\text{.htaccess}}$ rule to display a friendly “We’ll be back in 15 minutes” message. This prevents any new data (orders, comments) from being written to the old database that could be lost during the process to migrate your website.
Final Database Sync: Perform a final, quick database export from the old server and immediately import it into the new database (overwriting the tables). This closes the data replication gap by capturing the last few hours of activity.
Disable Maintenance Mode on the new website.
B. Updating Name Servers for Final Website Transfer
This is the single action that directs global traffic to your new server. You do this at your domain registrar (the company where you registered the $\text{.co.ke}$ domain), not your hosting control panel.
Action: Log into your registrar’s portal and navigate to the “Name Servers” or “DNS Settings” area.
Change: Replace the old host’s nameservers (e.g., $\text{ns1.oldhost.com}$) with the new Kenyan host’s nameservers (e.g., $\text{ns1.truehost.co.ke}$ and $\text{ns2.truehost.co.ke}$).
Wait: Save the changes and log out. The domain registrar immediately notifies the global network of root DNS servers of this change.
C. Understanding and Managing DNS Propagation in Kenya
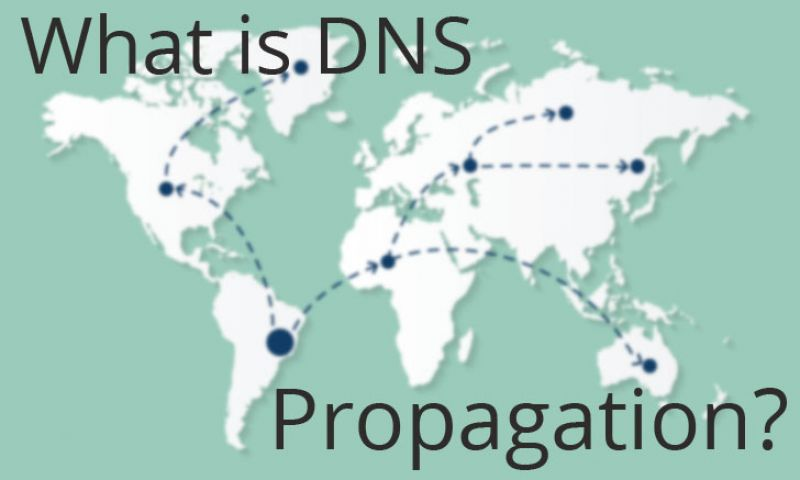
As discussed in the pre-migration checklist, DNS Propagation is the time it takes for DNS servers worldwide to update their cached record of your domain’s new IP address.
The TTL Impact: Because you lowered the TTL (Time To Live) in Step II to a low value (e.g., $300$ seconds), many users—especially local ones connecting through popular Kenyan ISPs—will see the new site within $\mathbf{30\ minutes\ to\ 2\ hours}$.
The Global Delay: However, some older or geographically distant ISPs may ignore the low TTL and hold onto the old cached IP for up to $48$ hours.
Strategy: Keep the Old Server Live:Crucially, do not cancel your old hosting account immediately. Keep your old server running for at least $\mathbf{48\ to\ 72\ hours}$. This acts as a safety net: users who haven’t received the updated DNS information will still be directed to the old (but paused) site, preventing a “Site Not Found” error and ensuring minimal downtime.
Leveraging Local CDNs (Optional): If you use a Content Delivery Network (CDN) like Cloudflare, the DNS switch is often near-instantaneous. You simply update the A Record IP address within the CDN’s control panel, bypassing most propagation delays.
Data Fact: While global DNS propagation can take up to $72$ hours, local DNS servers in high-density areas like Nairobi often pick up changes much faster due to higher refresh rates and optimized caching systems.
VIII. Step 6: Post-Migration Audit and Optimization
The process to Migrate your website isn’t complete when the DNS changes; it’s complete only when the new site is confirmed to be $\mathbf{100\%}$ functional globally, and you’ve finalized all SEO and security checks. This is the quality assurance stage to migrate your website
A. Comprehensive Post-Migration Audit Checklist
Immediately after you initiate the DNS change (Step 5), begin running these checks:
Confirm Global Reach: Use a public tool like DNS Checker to track the propagation status from multiple global locations, focusing particularly on nodes near Kenya and your key markets. The goal is to see your new Kenyan host’s IP address reflected everywhere.
Test Email Again: This is non-negotiable. Send test emails to and from all key email addresses ($\text{[email protected]}$) to ensure the MX Records are routing mail correctly and that the new mailboxes are active.
SSL and HTTPS: Verify the site automatically redirects from $\text{http}$ to $\text{https}$, and the padlock icon is green and secure. You should never migrate your website without an active SSL certificate.
Functionality: Re-run the critical tests from Step 4: forms, login portals, and e-commerce transactions. A successful migration means zero loss in functionality.
B. SEO and Analytics Verification
Your SEO health is your priority after you migrate your website.. You must ensure search engines understand that the move was intentional and permanent.
Google Search Console (GSC):
Submit Your Sitemap: Log into your GSC account and re-submit your sitemap. This immediately tells Google’s bots to crawl your new server.
Check Crawl Errors: Review the Indexing $\rightarrow$ Pages $\rightarrow$ Not Found (404) reports. A sudden spike in $\mathbf{404\ errors}$ suggests broken internal links or missing files caused by the move. Address these immediately with $\mathbf{301\ redirects}$.
Run a Site Move: If you changed the domain name (e.g., from an international $\text{.com}$ to a $\text{.co.ke}$), use the Change of Address tool in GSC to formally notify Google of the permanent move.
Google Analytics (GA):
Verify that your GA tracking code is installed correctly on the new server pages.
Check Real-Time reports immediately after the switch to confirm visitors are being recorded. If traffic drops to zero, the code is missing.
C. Speed Optimization and Security Cleanup
The move to a local Kenyan host should include a performance boost.
Speed Test: Run post-migration speed tests using tools like GTmetrix or Pingdom Tools, ensuring you select a test location near Nairobi (or the nearest available hub). This provides measurable proof of the performance boost from your low-latency local server.
Security Configuration:
Firewall: Enable any Web Application Firewall ($\mathbf{WAF}$) or advanced security solutions (like Imunify360) provided by the host.
Change Passwords: Change your cPanel, FTP, and CMS admin passwords now that the site is fully on the new, secure server.
Backup Verification: Configure and test the new host’s automatic daily backup feature. Ensure you know where the backups are stored and how to restore them.
D. Deactivating the Old Host
The 72-Hour Rule: Wait a minimum of $\mathbf{72\ hours}$ after the DNS switch before canceling your old hosting account. This allows even the slowest DNS caches to update and ensures a rollback option is available if an unforeseen catastrophe occurs.
Final Cancellation: Once all checks are green, all data is verified on the new server, and you have copies of all backups, you can confidently cancel the account with your old hosting provider.
IX. Troubleshooting Common Issues After You Migrate Your Website
Even with careful planning, small, frustrating issues can arise after you migrate your website is complete. Knowing how to diagnose and fix these common problems quickly will minimize your actual downtime and ensure you migrate your website successful.
A. Diagnosing and Fixing Connectivity Errors
Connectivity is the primary challenge during and immediately after you migrate your website
Problem
Symptoms & Cause
Quick Fix
Website Still Shows Old Site
Users in certain regions see the old site, but you see the new one. Cause: High local DNS Cache or ISP is slow to update.
Flush DNS: Clear your local DNS cache (ipconfig /flushdns on Windows or sudo dscacheutil -flushcache on Mac). Clear your browser cache completely. Use the DNS Checker tool to confirm the change is propagating in your area.
“Site Not Found” Error
Your site returns an ERR_NAME_NOT_RESOLVED error. Cause: DNS is pointing to an IP that is not active, or you changed the name servers incorrectly.
Verify Name Servers: Double-check your domain registrar to ensure the new Kenyan host’s name servers are entered exactly right, without typos. Keep the old server live as a fallback.
Connection Timeout
The browser tries to load the site but eventually times out. Cause: The A Record points to the correct new IP, but the server firewall is blocking your request.
Check Firewall: Contact your new Kenyan host’s support team immediately. They may need to whitelist your current IP address or check for an active Web Application Firewall (WAF) that is mistakenly blocking all traffic.
B. Resolving Application and Database Errors
These errors mean the site loaded, but the content or functionality is broken.
Database Connection Error:
Symptom: The site loads a blank white page with the error “Error Establishing a Database Connection.”
Cause: The new website files cannot talk to the new database. This is almost always caused by incorrect credentials in the wp-config.php file (or equivalent config file).
Fix:Verify Credentials: Log into your new host’s cPanel and check the exact database name, user, and password. Compare these details line-by-line with the wp-config.php file on your server. They must match perfectly.
Broken Images, CSS, or 404s:
Symptom: The site loads but looks unstyled, with missing images or links that go to the old domain.
Cause:Database Serialization: Directory paths (the locations of images and files) are hard-coded in the database and still point to the old server’s internal file path or the old domain name ([http://olddomain.com](http://olddomain.com)).
Fix:Run Search and Replace: Use a dedicated tool (like the Better Search Replace WordPress plugin) to safely search the database for the old domain URL and replace all instances with the new [https://yourdomain.co.ke](https://yourdomain.co.ke) URL.
C. Troubleshooting Email and Security Issues
Email service is often handled separately and needs its own check after you migrate your website
Email Not Working:
Cause: The MX Records (Mail Exchange Records) are either missing or pointing to the wrong server. If you host your mail with a third party (like Google Workspace or Zoho), the MX records must still point there, not the new hosting server.
Fix:Check MX Records: Log into your domain registrar and verify the MX records. If you want mail on the new host, ensure the records point to the new host’s mail server. If you use a third party, ensure the original records are still in place.
SSL/HTTPS Errors:
Symptom: Users see a browser warning that the connection is not secure.
Cause: The SSL certificate was not installed or was installed but is not properly redirecting traffic.
Fix:Force HTTPS: Use the cPanel’s SSL tool to ensure the certificate is active. Then, modify your .htaccess file (or use a plugin) to add a rule that forces all http traffic to https.
Pro-Tip on Linux: Linux servers (which Kenyan hosts typically use) are case-sensitive. A common error whn you migrate your Website is having file links that reference Image.JPG but the file is named image.jpg. Double-check all file names if images are missing!
X. Expert Tips for a Flawless Website Transfer
To move beyond just a successful process to migrate your website and achieve a truly flawless, optimized transition, experienced webmasters and developers employ a few advanced strategies. These techniques minimize risk, maximize speed, and guarantee a superior outcome when you migrate your website to your new Kenyan host.
A. Leveraging Advanced DNS Management
DNS is the most likely cause of downtime. Controlling it tightly is key.
Cloudflare is Your Best Friend: Using a global DNS and CDN provider like Cloudflare allows you to manage your DNS records from a single, high-speed interface.
Near-Instant Propagation: Because Cloudflare is a massive global network, updating the A Record IP address within their panel causes the change to propagate almost instantaneously across their network. This eliminates the $48$-hour propagation wait entirely.
The Switch: Instead of changing your domain’s nameservers, you simply log into Cloudflare and update the old IP address to the new Kenyan host’s IP address. This is the gold standard for near-zero-downtime process to migrate your website.
Staging Environment: If your site is extremely complex (like a large e-commerce platform), ask your new host if they can provide a staging environment. This is a perfect copy of your new server setup, allowing you to thoroughly test for weeks without impacting the live site.
B. Proactive Monitoring and Documentation
A failure to document is a plan to fail.
Set Up Uptime Monitoring: Before you change the DNS, register your new site’s address with an uptime monitoring tool (like UptimeRobot or StatusCake). Configure it to check your site every $5$ minutes.
Immediate Feedback: This provides immediate, non-biased feedback on whether the new server is responding correctly, and it begins building historical proof of your improved reliability on the Kenyan host.
Document Everything (The Migration Log): Keep a running log of every action taken:
11:30 AM: New database created ($\mathbf{new\_db\_123}$) and credentials saved.
1:00 PM: TTL reduced from $\mathbf{86400}$ to $\mathbf{300}$ seconds.
This documentation is your roadmap for any future troubleshooting or if you need to explain the steps to a support technician.
Post-Migration Speed Audit: After $72$ hours, ensure you are leveraging the local speed advantage. Use tools like $\mathbf{GTmetrix}$ or $\mathbf{PageSpeed\ Insights}$ and focus on optimizing these factors:
Image Optimization: Compress all images using tools like $\mathbf{TinyPNG}$.
Browser Caching: Ensure the $\text{.htaccess}$ file on the new server has aggressive browser caching rules enabled (Expires Headers) to leverage the local speed even further.
C. Considering Expert Migration Services
While this guide provides the blueprint, the most reliable and stress-free option is often delegation.
Free Migration Services: Many top Kenyan hosts, particularly Host Kenya,Truehost Cloud and Host Africa, offer free services to Migrate your website as a perk for signing up.
The Benefit: Their in-house experts perform the entire $\mathbf{website\ transfer}$ process, including the file sync, database connection, and most importantly, the email setup, using their own internal, high-speed tools. This is the simplest way to guarantee zero data loss and minimal downtime.
The Requirement: You only need to provide them with the cPanel/FTP credentials for your old host. This transfers the risk and technical burden entirely to the experts.
XI. Conclusion: Secure Your Data, Boost Your Speed
The decision to successfully migrate your website to a new Kenyan host is more than a technical housekeeping task; it’s a critical strategic investment in your business’s future success in the local digital economy.
By rigorously following this seven-step process—from pre-migration health checks and redundant backups to private testing and post-migration audits—you have executed a complex process to Migrate Your Website with the confidence of zero downtime and absolute data integrity. You have proven that to migrate your website does not have to result in lost data or revenue.
The benefits of this change are immediate and enduring:
A. The Bottom-Line Impact of Local Hosting
Superior User Experience: By eliminating the latency of international servers, you provide Kenyan customers with a lightning-fast browsing experience, reducing bounce rates and encouraging deeper engagement.
Enhanced SEO Performance: Faster loading times directly address Google’s Core Web Vitals, signaling to search engines that your site provides a high-quality experience, which can boost local search rankings.
Operational Efficiency: The ease of M-Pesa payments, local billing, and dedicated technical support that understands regional infrastructure makes managing your hosting account simpler and more reliable.
B. The Zero-Downtime Confidence
Your adherence to the strict protocol—especially the $\mathbf{TTL\ reduction}$ and the $\mathbf{Host\ File\ testing}$—ensured that when the public switch occurred, your visitors smoothly transitioned to the superior performance of the new Kenyan server without interruption.
Your process to Migrate Your Website is a testament to preparedness. You meticulously secured your files and database, verified functionality in a private environment, and managed the delicate process of DNS propagation.
C. Final Call to Action
If your business relies on local traffic, the speed and reliability of a local server are now non-negotiable competitive advantages. Take the final step: audit your new security configurations, set up long-term monitoring, and confidently cancel the old host.
Start leveraging the full speed and security of your new local Kenyan host today. The investment to Migrate Your Website will pay dividends in speed, stability, and customer trust for years to come.
XI. Conclusion: Secure Your Data, Boost Your Speed
The decision to successfully migrate your website to a new Kenyan host is more than a technical housekeeping task; it’s a critical strategic investment in your business’s future success in the local digital economy.
By rigorously following this seven-step process—from pre-migration health checks and redundant backups to private testing and post-migration audits—you Migrate Your Website with the confidence of zero downtime and absolute data integrity. You have proven that to migrate your website does not have to result in lost data or revenue.
The benefits of this change are immediate and enduring:
A. The Bottom-Line Impact of Local Hosting
Migrating to a local host strategically positions your business for success in the Kenyan market, offering measurable performance and financial advantages:
Key Benefit
Direct Impact on Business
Measurable Metric
Superior Speed (Low Latency)
Reduces visitor frustration and increases session duration.
Time To First Byte (TTFB) reduction (often by hundreds of milliseconds).
Enhanced Local SEO
Improved ranking in local search results ($\text{Nairobi}$ or $\text{Kenya}$ searches).
Bounce Rate reduction and improved Organic Traffic from local searches.
Financial & Operational Ease
Simplifies billing, eliminates FX risk, and offers fast, local support.
M-Pesa payment capability and $\mathbf{24/7}$ local support response time (often under 15 minutes).
Local Data Fact: Research shows that a 1-second delay in mobile page loads can impact conversion rates by up to 20%. By utilizing local Kenyan data centers and faster NVMe SSDs offered by hosts like Truehost or HostPinnacle, you are directly investing in higher conversions.
B. The Zero-Downtime Confidence
Your adherence to the strict protocol—especially the $\mathbf{TTL\ reduction}$ and the $\mathbf{Host\ File\ testing}$—ensured that when the public switch occurred, your visitors smoothly transitioned to the superior performance of the new Kenyan server without interruption.
When you migrate your website is a testament to preparedness. You meticulously secured your files and database, verified functionality in a private environment, and managed the delicate process of DNS propagation.
C. Final Call to Action
If your business relies on local traffic, the speed and reliability of a local server are now non-negotiable competitive advantages. Take the final step: audit your new security configurations, set up long-term monitoring, and confidently cancel the old host.
Expert Takeaway: For the highest confidence and lowest effort, remember that many top Kenyan hosts offer free services to Migrate Your website. If you are unsure about the technical details of the database sync or DNS coordination, leverage this free service to guarantee a flawless transition.
Start leveraging the full speed and security of your new local Kenyan host today. The investment to migrate Your Website will pay dividends in speed, stability, and customer trust for years to come.
Ready to Migrate Your Website?
The time to move your website is now. Stop losing local traffic to slow load times and unreliable international servers.
Take the next step: Contact a certified Kenyan web host like HostPinnacle or Truehost and ask about their free website migration service. This eliminates the technical risk and gets you onto a faster, local server with zero stress.
Migrate your website, boost your speed, and secure your future in the Kenyan digital landscape!